How to shoot video with Canon HD digicams
Sometimes it feels lonely for myself and “Avene” Glenn being amongst the very few who suggest small Canon digicams over dSLRs or full camcorders. These small HD digicams, usually priced from $100 to $350, are more capable than most people think of them. But cheaper/smaller usually mean hardware and software compromises, and as such, they require more filmmaking skill than camcorders. But if price and mobility are important to you, there is a way to get a professional-enough look out of them for use with artistic videos (for family/travel/sports/random videos, get a camcorder). Here’s how:
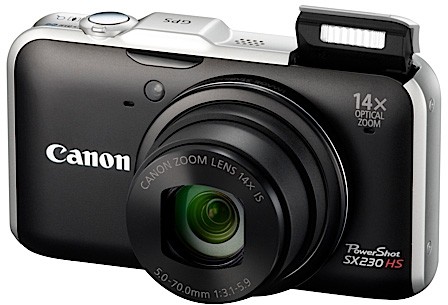
1. Acquire the hardware mentioned here. At the very least you should buy an SDHC Class 6 card, a second battery, and a tripod. Also a filter tube (lens adapter), and a 37mm 0.9 ND filter if your camera is NOT the Canon S100. The filter tube I suggest on the link works with most Canon digicams, but not the SX-series (their big super-zoom lenses don’t fit in it). As for more camera suggestions, check here.
2. When you get the camera, press FUNC, and go to “Custom Colors” and then press the DISPLAY button. There, bring all the way down (towards the left) contrast, saturation, and sharpness (essentially achieving “flat colors”). Shooting flat helps with color grading in post processing, and achieves more dynamic range and detail. Leave the rest of the color settings as-is. In the main video menu, disable “digital zoom”, and enable the “Grid Lines” that will help you shoot straight.
3. Strap the camera to the filter/lens adapter/tube. If shooting outdoors during the day, or under very strong lights, use the ND filter. If shooting indoors, don’t use the ND filter. These small-sensor digicams usually shoot in unnaturally high shutter speeds outdoors, resulting in the footage feeling “choppy”, so the ND filter helps us control this effect. Alternatively to buying the suggested above 0.9 strength ND filter, you can buy a “variable strength” 37mm ND filter, that has many different strengths all-in-one, which will help you control the shutter speed easier (it’s more expensive though). The Canon S100 (2011 model) has its own built-in ND filter, so use that instead of a third party adapter/filter.
4. Set the camera on a tripod, and make sure the tripod is “leveled”. Don’t shoot handheld, it never comes out great, since the Canon digicams only have “dynamic IS” in video mode, not true image stabilization. Plus, the newest models use CMOS, so there’s gonna be rolling shutter artifacts if you don’t use any stabilization method. Here’s a nice tip on how to pan smoothly, as long as your tripod head is sold as “fluid”.

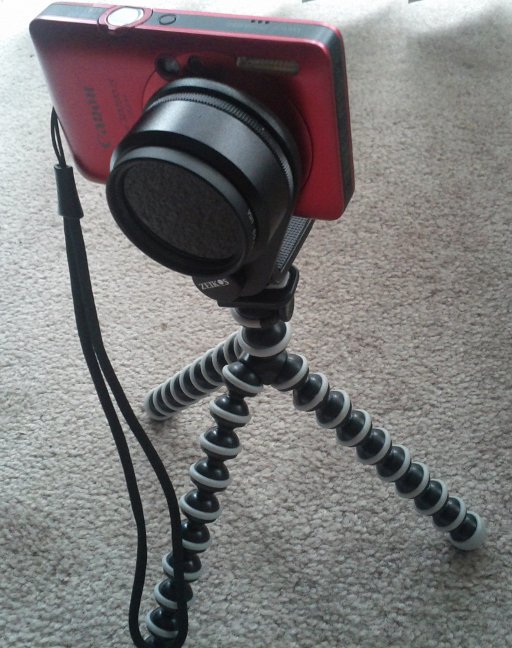
Canon SD780 IS with the Zeikos filter addon, Tiffen ND 0.9 filter, and GorillaPod
5. Zoom-in all the way for digicams that have up to 5x zoom, or as much as your movie set allows you to. Don’t zoom fully with super-zoom cameras. The zooming will create some background blur, to make your picture more pleasing. With the help of the ND filter, which will force the aperture open, you might be able to achieve some nice shallow DoF, even with such small cams. Finally, setup the lighting (if outdoors, make sure the sun is on your back), and frame your subject at its final position.
6. Go to the camera’s “P” mode. This is important: press the RIGHT button and turn the camera’s flash OFF. Then press the UP button to go to the exposure compensation screen. IF outdoors or under strong lighting, move the exposure compensation one or two notches to the left, until you feel the camera stops over-exposing. If indoors, leave it as is (Canon digicams tend to over-expose only under strong lighting, their algorithm is better indoors). Half-press the shutter button. The shutter speed information will be on screen momentarily. If you’re shooting at 24p, make sure the shutter speed shows as 1/48th or 1/50th. If you’re shooting 30p, make sure the shutter speed is at 1/60th. Adjust ND filter strengths (you can buy strengths that measure 0.3, 0.6, and 0.9 etc and then stack them, or you can buy a single one that has variable strengths all-in-one), or adjust lighting conditions, until you get the desired shutter speed. If these values are not possible, a bit higher shutter speed is acceptable, but less is not (video will look like a soap opera at lower values). Please note that the above trick approximating shutter speed works ok-enough under a lot of light, but under low light the P mode and video mode are not in agreement.

7. Now go to movie mode. Half-press the shutter button, keep it half-pressed, and then with your other hand press the LEFT button until you get the AFL indication on your screen. Now your focus is locked, you can take your fingers away from the various buttons. If the camera focused on the wrong subject, unlock focus, then slightly turn your camera so that it frames the subject in the middle of the screen, and then attempt to lock focus again. When this is done, and with the focus locked, turn the camera again to re-frame the exact same way you did at the end of step #5.
8. Then press UP and set exposure compensation the same way as above. Make sure you leave the exposure compensation screen ON while shooting, because that’s how you “lock” exposure (if you press the UP button a second time it unlocks exposure, and it goes back to AUTO). For the SX-, S- or any other series that features a “wheel”, you can lock focus and exposure compensation independently from each other by going to “manual focus” mode.
9. Now press the shutter button to record your video! Don’t move or pan too fast. Make sure you don’t zoom-in and -out while recording. Not only this would screw up your exposure and focusing, but it will make your video look amateurish — or at best it would look like a ’70s B-movie.
10. When you’re done shooting all your clips, bring the footage on your video editor, set the right project properties (your project properties must match the properties of the source footage), edit (remember, as a rule of thumb, only 1/10 of what’s shot is good-enough to be used, so don’t be afraid to throw away lots of your footage), color grade (so the “flat” colors are not as flat anymore, but don’t over-do it with contrast), and export like this (at the right frame rate). FYI, Vimeo has better quality than YouTube in HD.
What to expect
Here’s a sample from Canon SX200 IS: 720/30p slow’ed down to 24p. Color graded.
And here’s a short clip, directly out of the small SD780 IS camera (no color grading, or re-encoding of the video). Best watched on TV, using a PS3, XBoX360 or a Roku XD|S. Right click to download it, 14 MB.
Finally, for comparison’s sake, here’s what you get instead when you’re shooting in full AUTO, handheld, with these small cams: Sample one, and sample two.
Notes:
– If you’re shooting music videos, you can either shoot in 24p, or shoot in 30p and then slow them down to 24p like this.
– If shooting art videos, like these ones, then you can get by with higher shutter speeds than the ones suggested above, if desired.
– Because of the small sensors in these cams, tell your actors to not wear all-white or all-black clothes. Dark/light gray, and all other colors are fine. Use the same logic for your background imagery too, unless specifically you’re after the “burned” look.
– Only shoot videos in full AUTO mode if you’re shooting a concert/gig, since lights change rapidly in such a set.
– More info: How to achieve the movie look, and general filmmaking tutorials.


