Author Archive

But does it do 24p?

Among the emails I got lately, I got a number of people interested in sports and 24p. Well, let me say this for one more time: you don’t want to shoot sports in 24 frames per second. 24 frames are not enough for fast-moving sports (it’s ok for chess and poker, and that’s about it). Shelling $1000 to get the HV20 just because “it does 24p” when you want to shoot sports is unwise. Use the right tool for the job and shoot at the default 1080/60i or 50i, usually in high shutter speeds. Use 24p only for indie short movies and artistic music video clips, not for normal lifestyle stuff.

PS3 firmware 2.0

Supposedly it comes out tomorrow. I wish they could add just these three features:

1. Resize the TV picture, system-wide. Currently, all the visuals are out of the safe zone on our CRT HDTV. JBQ says that it might be difficult to do that after so many games having being released as resizing on the fly has a performance impact. The PSOne, PS2 and Nintendo Wii do not have that problem on our TV though.

2. Support the .mov container. Many people are exporting their videos on h.264, in the right format that the PS3 supports, but inside the .mov container instead of the .mp4 one. Both containers are equally popular with h.264 and so it’s kinda silly to support one but not the other.

3. Support NTFS. It is silly to want to connect a 500 GB external hard drive on the PS3 to store my (legal) HD videos, and have to deal with the 2 GB per-file limit of FAT32 (plus its non-journaling problems).

Other than these points, I am happy with the PS3. It doesn’t sweat at all on 1080/30p h.264 (where my PC plays back just 0.5 frames per second on the same video file).

The added cost of HDV/AVCHD

I received quite some email the last few days, following my popular videography article at OSNews. Many of the readers who emailed me want to buy an HD camcorder — and many of them are actually interested in 24p support. I don’t want to sound as an elitist, or even downright weird, but I must say: Stop. Buying an HD camera is not just a matter of buying just the camera because in order to fully appreciate it, it requires a lot of related hardware.

The average person still runs a 2-3 year old PC or laptop with 512 MBs of RAM. Why? Because simply put, it still works fine for basic computer tasks. Now, in order to edit HDV, and especially the more hungry AVCHD, you need a top of the line less-than-2-year-old CPU, 2+ GBs of RAM and large hard drives. Let’s just say that you can find such a PC for $1000.

Then, you need the HD camera itself, which costs anything between $850 and $1200. Then, you need software that supports HD. Premiere and Vegas are the best options for those serious about video editing, so that’s another $100. So overall, let’s just say that you need another $1000 for both.

Then, you need an HDTV. While in USA 36% of the population already has an HDTV, in Europe it is more like 5-10%. For a basic 32″ 1080i LCD HDTV you need another $500.

And then, you need to be able to watch your videos in HD without having to deal with tapes. And the best way to do that is not to buy Blu-Ray/HD-DVD burners+players+software which is just too expensive, but to use the PS3 or the XboX360 as h.264/m2t/WMV playback devices (they can store the video files on their hard drives, or by burning the HD files on plain DVD media). And that would be another $500 (sorry, the cheaper AppleTV v1.0 does not support full HD).

So basically, what I am saying here is that for the average Joe, moving from his DV camera to an HD one and truly appreciate it, he will need anywhere from $2000 to $3000. The product prices will come down, but not that much. He will still need to pay a lot of money to get the full Monty. Eventually, he will have to cave in and buy these upgrades, but my point is, he might want to start with an HDTV rather than an HD camera.

So my advice to you is: if you have that kind of money to spend just so you can properly enjoy HD, go ahead and do so. If not, keep that plain DV camera. At least for now.

Color Grading

I mentioned earlier that I always color grade my footage these days (guide here). I usually use ‘Brightness and Contrast’ controls, the Color Corrector 3-way wheel, Magic Bullet Movie Looks and occasionally the freeware Aav6cc plugin for Sony Vegas. I don’t use “Curves” that much. Here’s how some dull and unremarkable footage looks before and how it’s transformed afterwards. Read the rest of this entry »

Autumn flowers

I went out of the house today. Yaaay! Yup, just took my camera and walked around the block and shot some video. I might do the same tomorrow, dunno, walking around aimlessly is new territory for me. Anyways, here’s the result of today’s walk below, HD version here. It’s a 1′ 40″ min 720p video that took 3 hours to render on a 3 Ghz P4 because the version of “Magic Bullet Movie Looks” plugin I use is unaccelerated. I intend to buy the new (accelerated) version that was released a few days ago for several NLEs when it comes out for Vegas too (supposedly it will be released for Vegas sometime next year). I find myself using it on every single clip in the timeline the last few weeks or so. I always color grade now. Not a single clip goes unretouched in one way or another.

My online friend Ivan also posted a beautiful video today, it’s my favorite of his works so far. Ivan got some good SD footage out of his Canon ZR800/MD101 camera.

“Lost” is kinda lost

Ok, so “Lost” might not be in a better shape than the rest of the TV series with this WGA strike. Nevertheless, the first mobisode was released yesterday, involving Jack and his father. To be honest, I would have preferred that the mobisodes are about the rest 35 survivors, where we get to meet them, one by one, with the main characters just popping up for a few seconds only, per mobisode. That’s how Nicki and Paulo should have introduced too.

Videography best practices

If you are new to video, here are some advices.

1. Always use a tripod, and a tripod with a fluid head at that. Most people try to become “artsy” but they shoot without a tripod and their footage ends up looking amateurish (except if that’s the intended look, of course). Solid tripod legs that withstand the wind with a good fluid head will cost you anywhere from $100 to $150. Don’t use the old photography tripod of your uncle Joe, photography tripods don’t have fluid heads. And some tripod-specific tips: Use this trick to achieve fluid, smooth pans. And make sure your horizon is always straight! You can adjust the tripod legs in a way that the recording image is always straight!

2. Light is important. You can adequately film good footage on a sunny day either early in the morning, or just a few hours around the sunset. All other times during a sunny day is pretty harsh on natural light and tend to over-expose and look bleached (cloudy days are fine). Never shoot against the sun or against high-contrast background. Always control your exposure manually if the camera’s automatic controls can’t manage to expose correctly. Remember, it’s better to under-expose rather than to over-expose: the first one is kinda fixable on post processing with a video editor, but the second one is not. If you have no alternative but to film on sunny days when the sun is high, buy an Neutral Density (ND3 up to ND6) filter and a Polarizer filter. Depending on the filter size of your camcorder’s lens, you will end up paying between $50 and $100 for those. These are important filters if you are shooting when the light is harsh, or when you want to cut down reflections. The ND filter will also provide more background blur when zoomed in, helping you achieve the “film look”. Please note though that most cheap camcorders can’t use filters.

3. If you are shooting indoors, always, use a custom white balance setting using a gray card. If your camcorder does not allow you to modify the white balance to user’s wishes, throw it away — or give it to your dad and buy a new one. If you shoot indoors where the lighting is artificial, you will end up with unnatural or muted colors, so it’s highly recommended you set the white balance for every room or scene you shoot. A gray card costs $5 and it’s easy to use: you simply place the card at the place you want to shoot, you zoom-in all the way to the card and you set the white balance at that point. Sure, you can fix the white balance on post, but digital correction is not as accurate or as artifact-free as the in-camera one.

4. If you are shooting a single subject (e.g. a bridge), scrutinize it. Shoot small details about it, big details about it, find what special characteristics this subject has and exploit them. You will have to adjust your tripod numerous times to make sure it’s level and straight, or to get the shot you want. Additionally, try to shoot scenes that have some motion in them and not looking like still photos. For example, you can shoot a pretty boring part of the bridge, but you can have some moving water in the background, or some trees dancing in the wind, or the shadows of people walking by, or the people themselves.

5. Color-grade your footage. On your video editor use plugins that will make your footage “pop up”. Here is an example of how some footage was shot and how it was made to pop up on screen. Sony Vegas comes with very good grading plugins, plus this freeware plugin which extends its abilities quite a lot. As for the rest of editing, make sure you chop your clips when required (don’t feel bad for it), or even completely discard clips from the final cut if they are shaky or they have a bad composition. For example, if you have 8 seconds of a clip but the last 2 seconds are shaky, chop these last 2 seconds off. Also, don’t use more than 7-10 seconds of a single scene — internet viewers are not as patient as TV viewers.

6. If your video editor has this ability, prefer to export your footage in h.264/AAC format inside an .mp4 container (instead of the less compatible .mov container). If you are exporting for youtube, use the 480×270 resolution, at 1 mbps bitrate. If you are exporting for Vimeo HD, export in 1280×720 at 4 mbps VBR (5 mbps peak). If you are exporting for the TV (including burning a DVD or using the AppleTV or the XBoX/PS3), you will have to modify your video’s gamma values and your TV’s. You will have to do numerous tests to find what are the best colors/gamma values for your video that look natural on your TV. My linked tutorials about gamma values work for me, but each TV is different, so you will have to experiment.

Foster City

A second take on Foster City with old and new footage (fresh from last evening). Graded with Magic Bullet “Movie Looks”. Unfortunately, Vimeo has a bug and sometimes you hit one of their servers that it won’t re-encode in HD (or something). So until the Vimeo guys fix it for me and add HD capability to my video, here’s the SD version.

Update: They fixed it, thanks guys. HD version here.

Emulating the 35mm adapter look

HDV footage that was shot with a 35mm adapter just looks different and shallow focus is not to blame. I can’t pinpoint exactly what makes it look different (except the fact that the footage is less sharp because it’s recording through more glass), but it just looks different than video. Here’s an example below.

So I took the job today to color grade my stock 1080/60i footage and try to emulate a specific 35mm adapter/lens look that occurs on SOME footages (not all). JBQ hates how everything looks yellow, but I just love that look and so by using Sony Vegas and Magic Bullet Movie Looks I was able to come pretty close. I used the “Curahee” Magic Bullet template and then modified the saturation, gamma and gain pretty significantly. Here’s what I came up with:


Better quality .mp4 video file here.

However, there is no perfect solution of course for this kind of extreme grading. For example, you have to under-expose consistently during shooting in order to get a good result with this method during post processing. If you shoot your video with normal exposure, chances are that all the highlights will be blown out after applying the plugins.

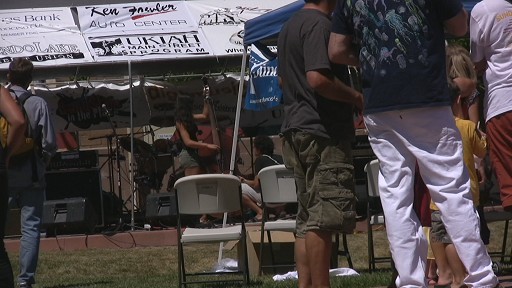
As shot, straight out of the camera:

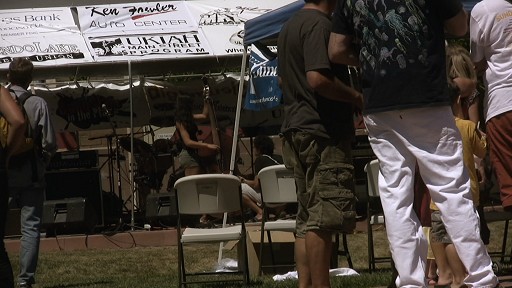
With Curahee at 50%:

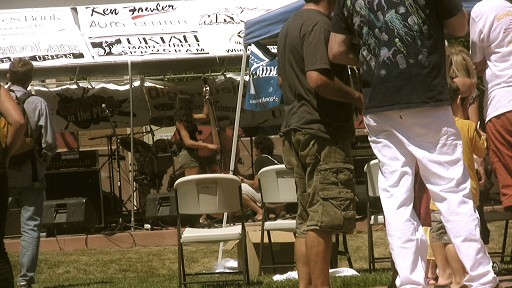
With Curahee at 100% and Color Corrector’s saturation, gain and gamma:

(On the pictures above, Andy Kong and his sister are preparing to perform at Ukiah’s music festival last August).

No comment

Yahoo vs Google